
Locking pliers heavy duty are the tool you reach for when your hands, a standard wrench, or a regular pair of pliers just cannot keep a steady bite on stubborn material.
If your grip keeps slipping, you are not alone, most “bad plier experiences” come from a mismatch between jaw style, adjustment, and the surface you are grabbing, not from lack of strength. The upside is you can fix most of it in minutes once you know what to look for.
This guide breaks down what actually makes a heavy-duty locking plier feel secure, how to choose the right jaw pattern for the job, and how to set it so you clamp hard without wrecking bolt heads or softer stock.
Why heavy-duty locking pliers slip (and what “secure grip” really means)
A secure grip is not just “more pressure.” It is consistent jaw contact plus enough clamping force to resist twist, vibration, and sudden load changes without walking off the workpiece.
In real shops and garages, slipping usually traces back to a few patterns:
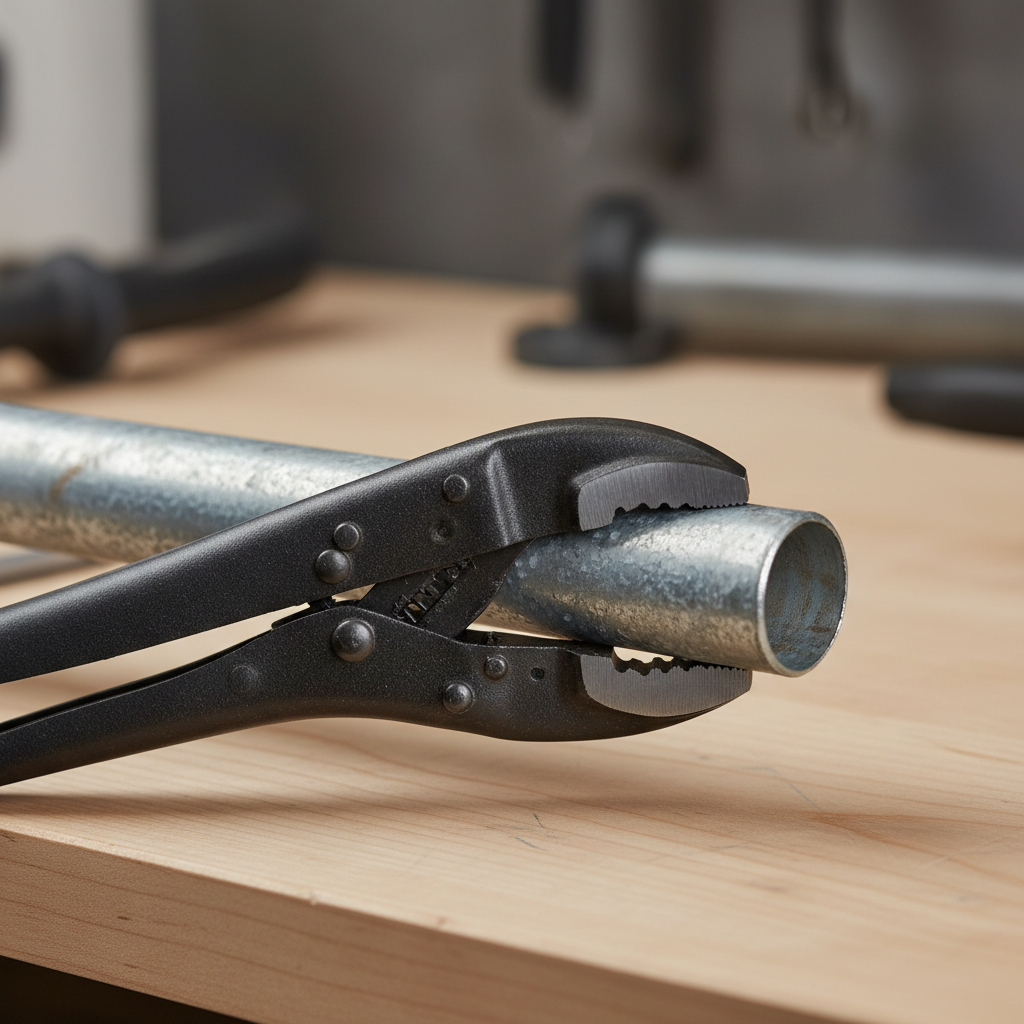
- Wrong jaw geometry: curved jaws on a flat surface, or long-nose jaws on a rounded pipe, leaves less contact area so the tool skates.
- Under-adjusted screw: the tool locks, but it never reaches the clamp load you think you set.
- Over-adjusted screw: you crush corners, deform threads, or “mushroom” softer metals, then the jaws lose their bite.
- Contamination: oil, cutting fluid, paint dust, or rust scale can act like a lubricant or a layer that breaks loose mid-pull.
- Angle and torque: pulling at an odd angle loads one jaw edge, which encourages twist-out.
One more nuance, “heavy duty” often helps because thicker handles and stronger pivot hardware reduce flex, but the best frame still performs poorly if the jaw style and setup are off.
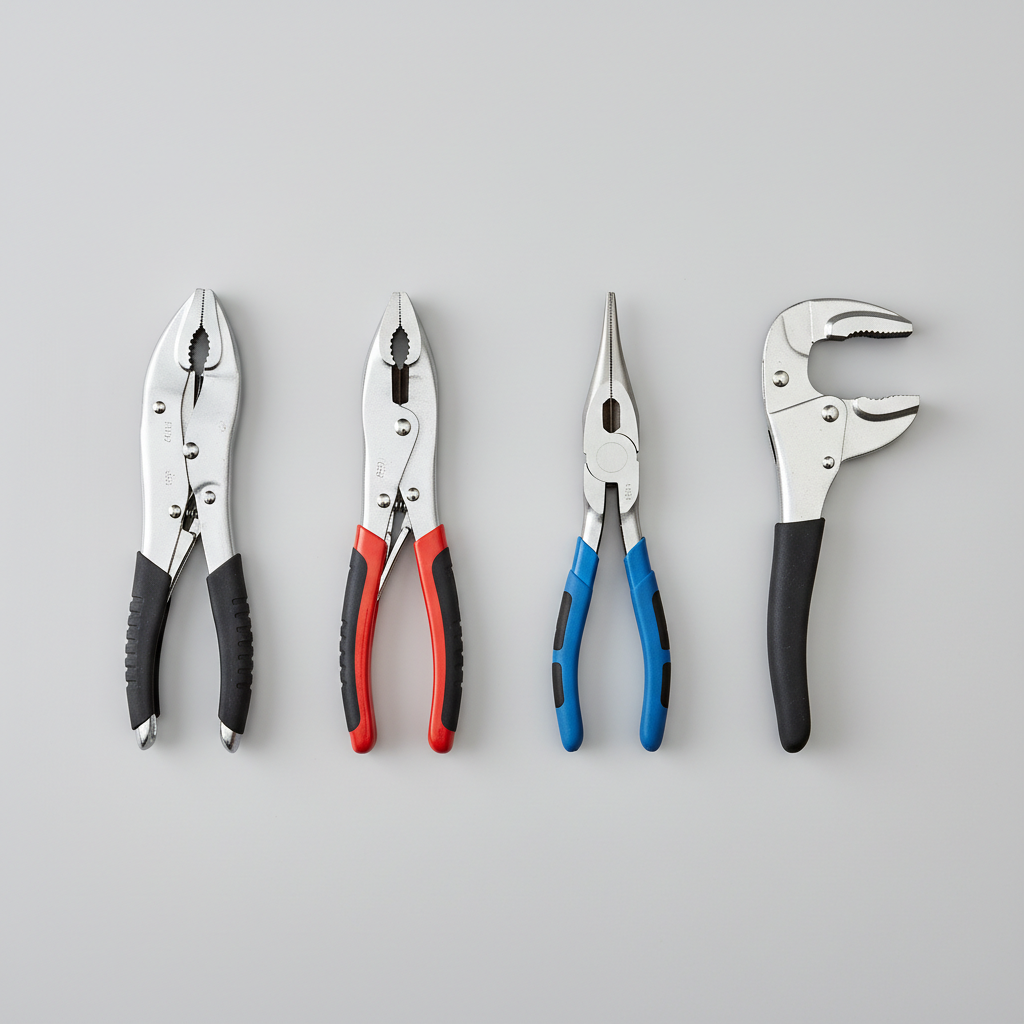
Choosing the right jaw style for the job
If you only remember one thing, match the jaw to the shape you need to hold. It matters more than brand names in many situations.
| Jaw style | Best for | Where it can go wrong |
|---|---|---|
| Curved jaws (with wire cutter on many models) | Pipes, round stock, irregular shapes | Can scar flats and can slip on thin sheet edges |
| Straight jaws | Flat bar, angle iron, square stock, clamping two pieces together | Less forgiving on round surfaces |
| Long-nose | Tight access, small parts, hose clamps, light grab-and-hold | Not ideal for high torque or large fasteners |
| Locking wrench / “pliers wrench” style | Fasteners where you want less rounding than serrated jaws | Usually bulkier head, may not fit tight spots |
| C-clamp locking pliers | Panel work, welding fixtures, wide jaws for alignment | Slower positioning, not a substitute for a real clamp in long setups |
When the goal is “hold and turn” on a rounded-off bolt, curved serrated jaws often win, but if you want to avoid damage on a good fastener, a locking wrench-style jaw is usually a safer bet.
Quick self-check: do you need “heavy duty,” or just better setup?
Before you replace what you already own, run this short checklist. It helps separate tool limits from technique issues.
- The handles visibly flex when you lock down, or the pivot feels loose under load: heavier construction often helps.
- The jaws meet unevenly (one corner touches first) even after cleaning: that points to wear or misalignment.
- The adjustment screw bottoms out but still feels weak: the tool may be undersized for the job.
- It holds at first, then creeps: commonly oil/paint on the surface, wrong jaw style, or pulling at an angle.
- It damages everything: likely over-tightening or serrations on soft materials, consider softer jaw covers or a different tool type.
If you check only the last two boxes, you might not need a new pair. If you check the first three, upgrading to locking pliers heavy duty is often justified.
How to set heavy-duty locking pliers for maximum grip without wrecking the work
The adjustment screw is where most people either lose grip or create damage. The goal is “firm lock” with controlled pressure, not brute force.
A simple setup method that works in most situations
- Clean the bite zone quickly, even a dry rag helps, if it is oily, use a suitable degreaser and let it flash off.
- Open the jaws, position them square to the surface, then close the handles until the jaws touch.
- Turn the adjustment screw until you feel light resistance, then add a small extra turn, many people use about a quarter to half turn as a starting point.
- Lock the handles, test with a controlled pull, if it moves, unlock, add a small turn, retest.
Practical cue: you want the release lever to require deliberate pressure, but not a fight. If you need two hands to release under no load, you probably over-set it.
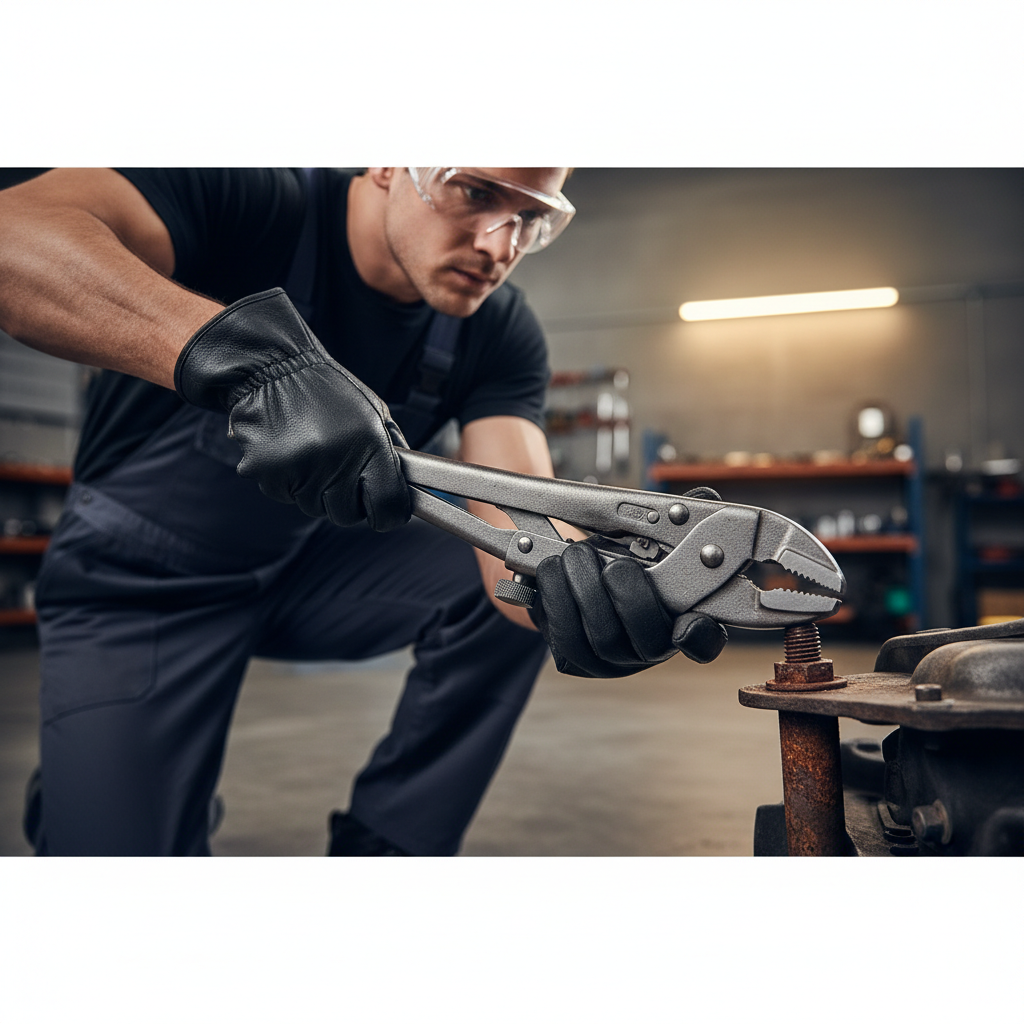
When you are gripping fasteners (bolts, nuts, fittings)
- Try to clamp on the flats, not the corners, corners round fast and reduce future options.
- Pull the tool so force stays in line with the handles, side-load makes it walk.
- If the fastener is still usable, consider a non-serrated locking wrench style to reduce marking.
When you are gripping pipe or round stock
- Curved jaws usually seat better, but you still want full jaw contact, not just the tips.
- If the surface is polished, lightly scuffing with abrasive can improve bite, but that is a judgment call if finish matters.
Safety and damage control: what to watch during high-force pulls
Locking pliers can generate surprising clamp force, and that is where injury or part damage can happen. According to OSHA, using the right tool and maintaining it properly is a core part of preventing hand injuries in workplaces, even though specific tasks vary by industry.
For home and shop use, a few habits reduce risk in a very practical way:
- Keep your free hand out of the pinch path, when the tool releases suddenly, knuckles usually lose that argument.
- Avoid cheater pipes on the handles unless you truly understand the load path and your work is secured, over-torque can break tools or slip off.
- Use eye protection when pulling on stuck parts, sudden release can fling debris, if you have specific safety concerns, consider asking a qualified professional.
- Do not use as a lifting device, they are not rated like rigging hardware.
Buying guide: what matters in heavy-duty locking pliers
When you compare options, it is easy to get distracted by handle shape or “max torque” marketing. The features below tend to matter more in day-to-day use.
- Build and pivot tightness: less slop means more predictable clamping, especially under twisting loads.
- Jaw hardness and serration quality: cleaner machining usually bites more consistently and wears slower.
- Adjustment screw feel: smooth threads make fine tuning easier, gritty threads make people over-tighten.
- Release lever access: if you work in tight engine bays or racks, an awkward release becomes a real annoyance.
- Size range: a “bigger” model is not always better, oversizing can reduce control on small hardware.
Key takeaway: if your main use is rounding-off rescue work, prioritize aggressive curved jaws and stiffness. If you mostly hold parts for alignment, straight jaw or C-clamp styles can feel calmer and more precise.
Practical use cases and step-by-step moves that usually work
Below are common scenarios where locking pliers heavy duty earn their keep, plus a few steps that prevent the usual failure modes.
1) Removing a rounded bolt head
- Brush off rust scale so the jaws bite metal, not loose crust.
- Clamp as low and square as access allows, aim for maximum contact.
- Rock the bolt slightly tighter, then looser, rather than one big pull.
- If it will not budge, heat, penetrant, or extraction tools may be needed, and depending on the equipment, a professional mechanic might be the safer route.
2) Holding material for drilling or grinding
- Use straight jaws where possible to reduce twist.
- Clamp the work to a bench or fixture when you can, hand-holding with pliers is where slips become injuries.
- Recheck clamp tension after vibration-heavy steps, it can loosen slightly as surfaces settle.
3) Pinching a hose or line temporarily
- Use jaw covers or a dedicated pinch-off tool to reduce damage, serrated jaws can cut into rubber.
- Do not treat it as a permanent solution, if it is a critical line, consult a qualified technician.
Conclusion: getting a secure grip is mostly about matching, setting, and pulling clean
A good pair of locking pliers heavy duty can feel almost “set and forget,” but the real win comes from small decisions: pick the jaw that matches the shape, dial the screw for firm lock instead of crushing force, and pull in line so the tool stays seated. If your current pliers flex, creep, or misalign, upgrading makes sense, otherwise, a quick cleanup and better setup often fixes the slip.
If you want a fast next step, pick one job you do often, like rounded bolts or pipe fittings, then choose the jaw style that fits that job and practice the adjustment in a controlled test before you need it under pressure.
FAQ
Are locking pliers heavy duty worth it for home use?
Usually, yes if you work on rusted fasteners, heavier fixtures, or anything that needs sustained clamp force. If you only do light tasks, technique and jaw choice may matter more than a beefier frame.
How tight should I set the adjustment screw?
Tight enough that the tool locks without creeping under a firm pull, but not so tight that the release becomes a struggle. If you see crushed corners or deep jaw marks on parts that should stay intact, back off a bit.
Why do my locking pliers slip on oily metal?
Oil reduces friction and the jaws can hydroplane on the film. Wipe the surface, consider a mild degreaser, and make sure the jaws sit square with full contact.
Do curved jaws or straight jaws grip better?
It depends on the shape. Curved jaws tend to excel on round stock and irregular shapes, while straight jaws feel more stable on flat material and can reduce twist.
Will serrated jaws damage bolt heads?
They can, especially on softer hardware or if you clamp on corners. If you want less marking, a locking wrench style or protective jaw covers may be a better choice.
Can I use a cheater bar on locking pliers handles?
It is possible but risky, it increases torque beyond what the tool and your setup might handle, and slips can be sudden. If you are routinely tempted to do it, consider a different removal method or professional help.
How do I know when to stop and call a professional?
If the part is safety-critical, expensive, or you are close to snapping a fastener in a hard-to-reach place, pausing early can save time and money. A mechanic or qualified tradesperson often has heat tools, extractors, and experience that reduce collateral damage.
If you are trying to standardize your kit for repetitive work, it can help to pick one or two jaw styles you use most, then add a heavy-duty version in the size you actually reach for, that approach usually feels more “money well spent” than buying a random set.