
how to use a rivet gun to set rivets comes down to three things: matching the rivet to the material, prepping the hole cleanly, and pulling the tool straight until the mandrel snaps.
If your rivets spin, sit proud, or pull through thin metal, it usually isn’t “bad rivets” so much as a sizing or setup issue. The good news is most fixes are quick once you know what to look for, and you don’t need a machine shop to get professional-looking results.
This guide focuses on blind rivets, often called pop rivets, because that’s what most rivet guns in home garages and light fabrication use. You’ll get a practical checklist, a step-by-step process, and the small details that keep mistakes from repeating.
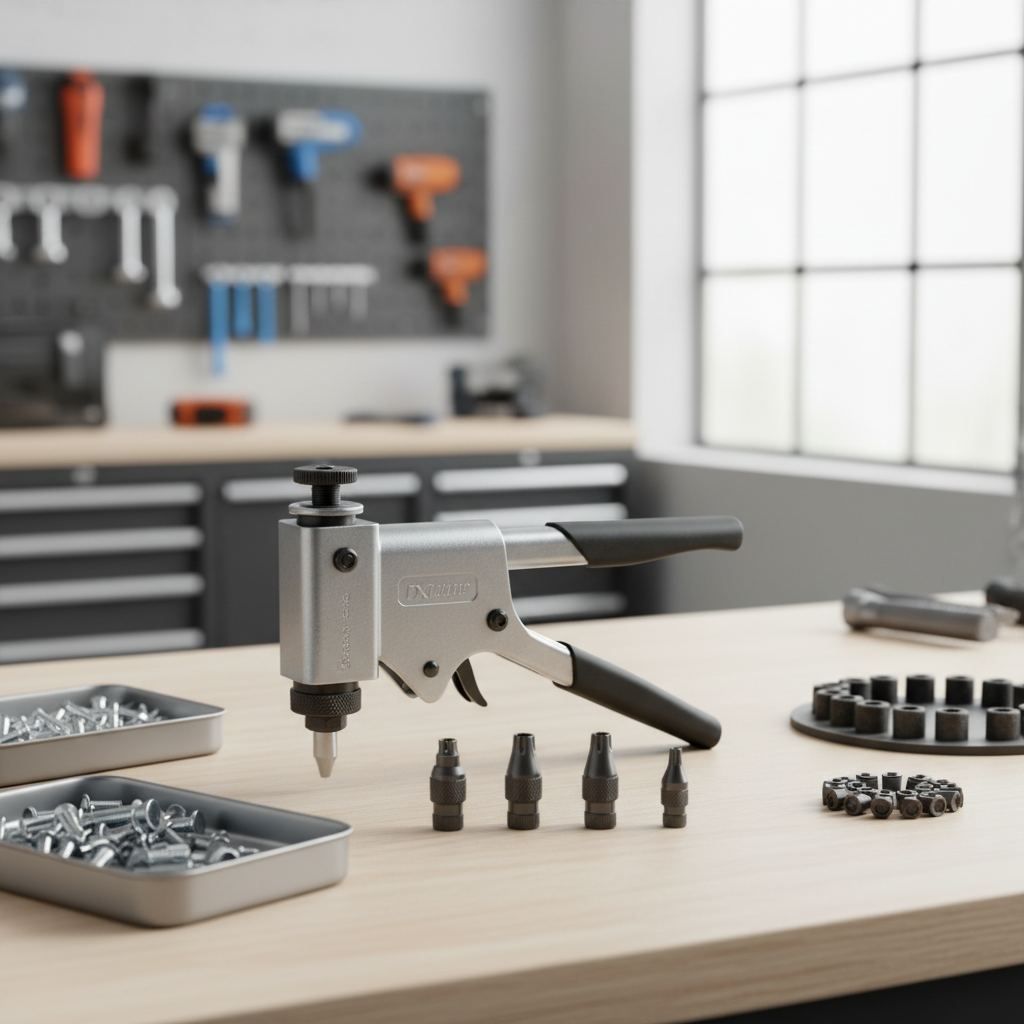
Pick the right rivet gun and rivet type for the job
Before you squeeze anything, get clear on what system you’re using. “Rivet gun” can mean a hand pop-rivet tool, a pneumatic/hydraulic puller, or even a solid rivet gun used with a bucking bar. This article assumes a pull-type tool for blind rivets.
- Hand rivet gun: affordable, good for occasional use, tougher on hands for large rivets or steel mandrels.
- Pneumatic rivet gun (air puller): faster and more consistent on repeat work, helpful for stainless rivets.
- Battery rivet tool: convenient for field work, usually pricier, great when you do a lot of rivets.
Rivet material matters too. Aluminum rivets are easy to set and common for sheet metal. Steel or stainless rivets hold stronger but take more pull force and can crack thin material if oversized.
According to OSHA, using the right tool and maintaining control of the workpiece reduces common shop injuries, especially when drilling and handling sharp sheet edges.
Understand rivet sizing: diameter, grip range, and head style
Most “bad rivet” problems trace back to one mismatch: the rivet doesn’t fit the hole, or the grip range doesn’t match the stack thickness. When that happens, the rivet can mushroom wrong, clamp weakly, or distort the material.
Three specs you should check every time
- Diameter: common sizes include 1/8 in, 5/32 in, 3/16 in. The drill bit size usually matches the rivet size (or the manufacturer’s chart).
- Grip range: the thickness the rivet can clamp, measured as the total thickness of the materials being joined.
- Head style: domed/round head for general work, large flange for softer or thin materials, countersunk when you need a flush surface.
Quick reference table
| What you see | Likely cause | What to change |
|---|---|---|
| Rivet spins after setting | Hole too large or wrong grip range | Use next diameter up, or correct grip range; drill clean, not oversized |
| Head sits proud, gap remains | Grip range too long or parts not clamped | Clamp tighter; choose shorter grip |
| Backside pulls through thin sheet | Material too thin for standard flange | Use large flange rivet or add a washer/backing plate |
| Mandrel won’t snap cleanly | Tool not aligned or rivet too strong for tool | Pull straight; upgrade tool or choose easier material |
| Material dents around rivet | Overpulling, thin sheet, or wrong head style | Use large flange; confirm grip; avoid oversize rivet |
Prep work that actually makes the rivet hold
The setting step is quick. The quality comes from everything right before it, especially hole quality and fit-up. This is where people rush, then wonder why the joint feels sloppy.
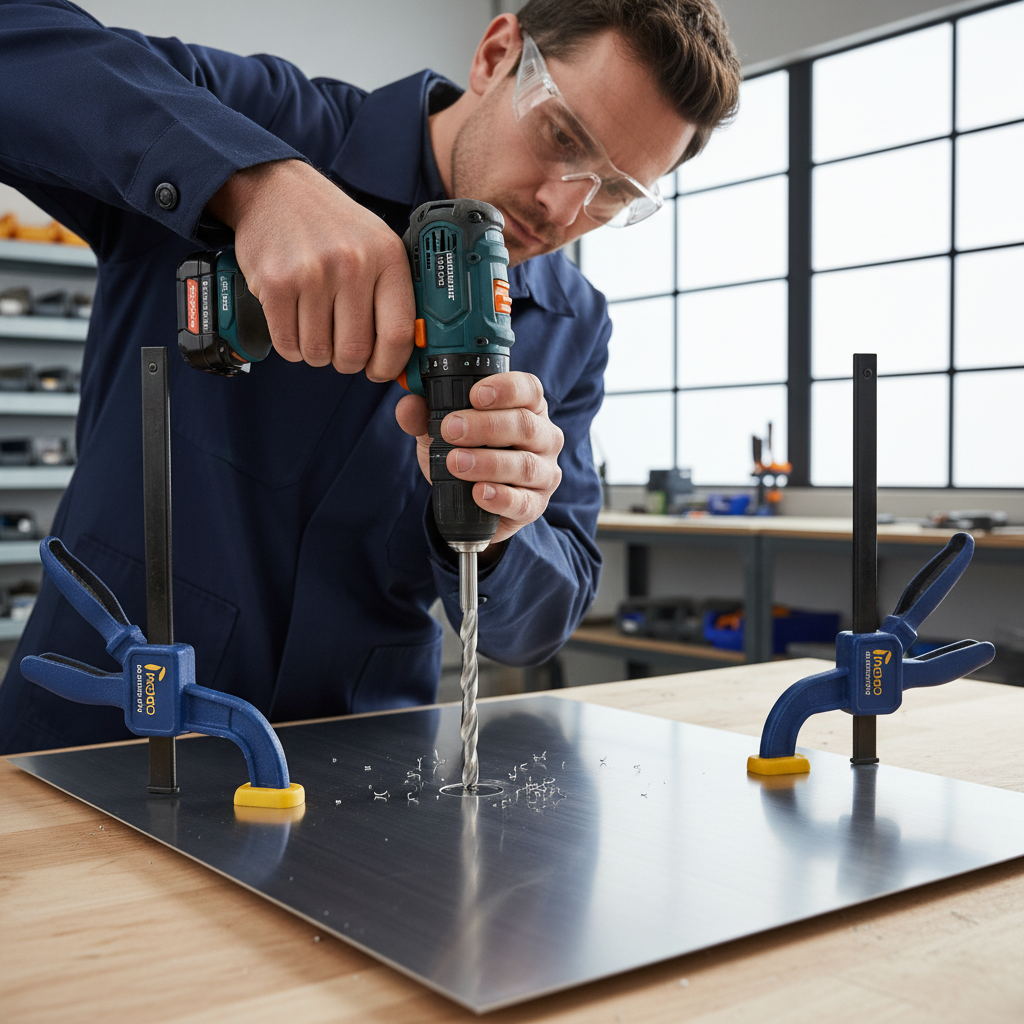
- Mark and center punch so the bit doesn’t walk, especially on metal.
- Drill square to the surface. A tilted hole makes the rivet set crooked and weak.
- Deburr both sides. Burrs hold the parts apart and can mimic “wrong grip range.”
- Dry fit the rivet in the hole. It should slide in without forcing, but not wobble.
- Clamp the work if the parts want to separate. A rivet cannot pull parts together well if the gap is big.
For painted or coated surfaces, consider whether you need a touch-up around the hole. Bare metal edges can corrode over time, depending on the environment and metals involved.
Step-by-step: how to use a rivet gun to set rivets
Once sizing and prep are correct, the actual installation feels almost boring, which is exactly what you want. Keep the tool straight, keep the work tight, and let the rivet do its job.
Tools and supplies
- Rivet gun with correct nosepiece
- Blind rivets sized for your hole and grip range
- Drill and correct bit
- Deburring tool or larger bit for a quick chamfer
- Clamp(s), marker, center punch
- Eye protection and gloves (sheet metal edges can cut)
Installation steps
- Set the nosepiece for your rivet diameter, then thread/tighten it snug.
- Insert the mandrel into the gun until the jaws grab it. With some tools you’ll feel a small “click.”
- Push the rivet body into the hole until the head seats flat against the material.
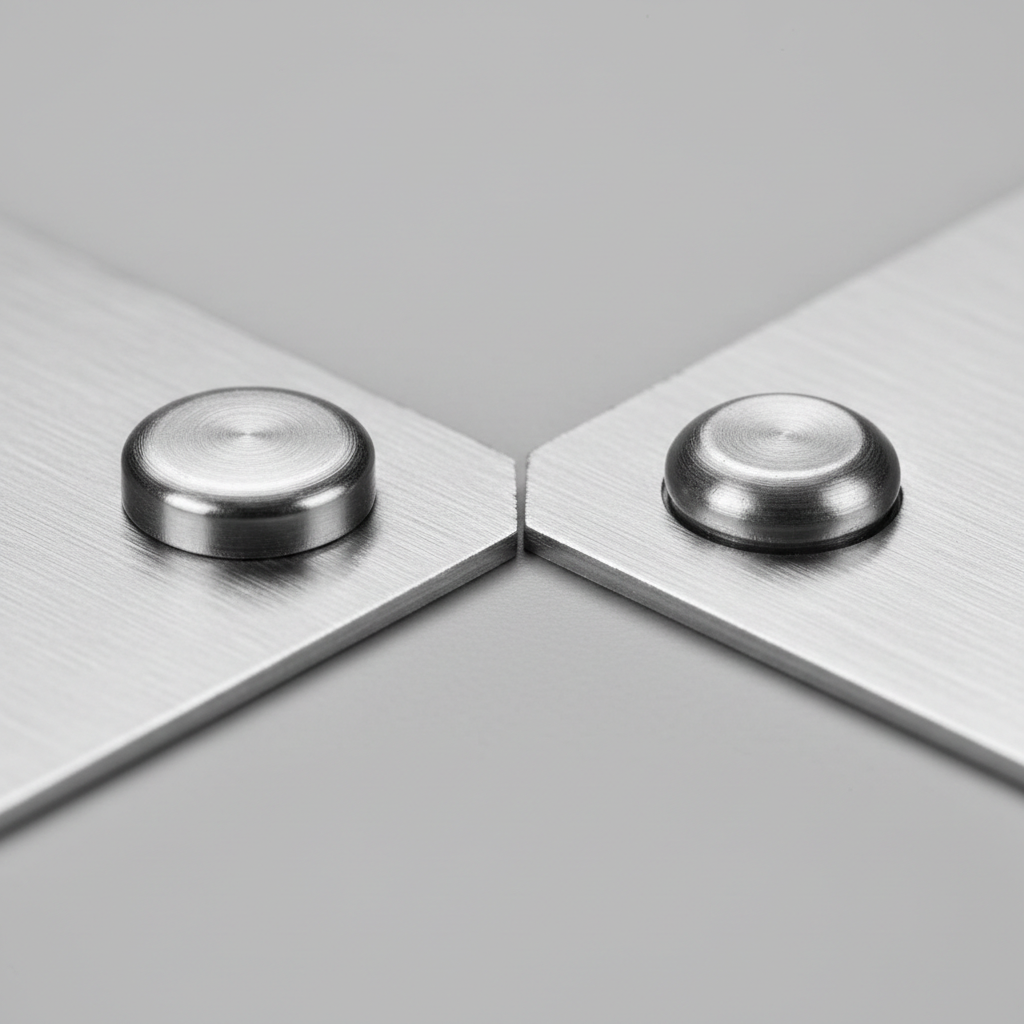
- Hold the tool perpendicular to the surface. This keeps the backside bulb centered.
- Squeeze the handles (or trigger) in controlled pulls until the mandrel snaps.
- Check the set: head sits flush, no gap between parts, backside bulb formed, mandrel stem breaks at the designed point.
Key point: if the rivet head starts to tilt while pulling, stop and reset your alignment. Many “mystery failures” are just a tool held at a slight angle.
Self-check: are you doing it right or just getting lucky?
If you do one rivet a month, it’s easy to assume things are fine until a panel rattles loose. This quick check helps you decide whether you should change your process before you continue.
- After setting, the rivet head sits flat with no rocking when you press around it.
- The joint feels tight, parts don’t slide when you try to twist by hand.
- The backside bulb looks centered, not smeared to one side.
- No cracks around the hole, no obvious denting in thin sheet.
- Mandrel break is clean, and the stem isn’t sticking out dangerously.
If two or more items fail, don’t just keep going. Re-check hole size, grip range, and whether the parts are clamped tightly before pulling the rivet.
Troubleshooting common issues (and what to do next)
When a rivet goes wrong, you usually get one of a few repeating patterns. Fixing them is less about force, more about choosing the right combination.
Rivet won’t pull, mandrel slips
- Confirm you installed the correct nosepiece and the jaws are not worn.
- Clean the tool nose and jaws, light debris can reduce grip.
- If you’re using stainless rivets, a light-duty hand tool may struggle; a heavier tool or air puller helps in many cases.
Rivet sits loose even after the mandrel snaps
- Grip range likely too long for your stack thickness, switch to a shorter grip.
- Parts may have separated during pulling, clamp firmly and try again.
Rivet deforms the workpiece
- Use a large flange rivet or add a backing washer for thin material.
- Consider smaller diameter if the load doesn’t require a big rivet.
Need to remove a bad rivet
- Center punch the rivet head, drill through the head with a bit close to the rivet diameter.
- Pop the head off, then push the remaining body through with a punch.
- Enlarge the hole only if necessary, oversized holes force you into a larger rivet or a different fastener.
According to OSHA, eye protection matters during drilling and fastener removal because chips and snapped mandrels can become projectiles.
Safety and “small” details that prevent injuries and rework
Riveting looks harmless until the mandrel snaps and shoots somewhere, or the edge of sheet metal catches your hand. A few habits reduce the chances of that happening.
- Wear safety glasses; snapped mandrels and drill chips travel unpredictably.
- Capture mandrels if your tool has a collector, or keep a cup nearby; stepping on stems is a classic shop annoyance.
- Support thin panels so they don’t oil-can or bend while pulling.
- Watch for mixed metals. Aluminum rivets in steel panels can contribute to corrosion in some environments; sealants or matched materials may help depending on use.
- If you’re working on a critical structure (trailers, roll cages, aircraft parts), consider consulting a qualified professional since fastener choice can become safety-critical.
Practical takeaways for cleaner, stronger rivets
If you only remember a few things, make them these: measure total thickness for grip range, drill clean and deburr, clamp the parts tight, and pull the tool straight. That combination solves most frustration around how to use a rivet gun to set rivets without adding fancy equipment.
Your next action is simple: pick one scrap piece of similar material, set three rivets on purpose, then inspect the backside bulbs and joint tightness. That quick practice round saves a lot of re-drilling on the real part.
FAQ
What size drill bit should I use for pop rivets?
In many kits the bit size matches the rivet diameter, but tolerances vary by manufacturer. If you have packaging, follow that chart; otherwise, test on scrap so the rivet slides in without wobbling.
Why does my rivet spin after I set it?
Most often the hole is slightly oversized or the grip range is too long, so the backside bulb never clamps firmly. Switching to the correct grip and drilling cleaner, more accurate holes usually fixes it.
Can a hand rivet gun set stainless rivets?
Sometimes, but it depends on the tool and rivet size. Many light-duty hand tools struggle with stainless mandrels, so an upgraded hand tool or pneumatic puller can make the set more consistent.
How do I know if the rivet grip range is correct?
Measure the total thickness of the materials you’re joining, then choose a rivet whose grip range includes that number. If the joint is loose after setting, you’re often on the long side of the range.
Do I need washers with blind rivets?
Not always. Washers or backing plates help when the backside material is thin, soft, or prone to pull-through, especially with higher loads or vibration.
Is countersunk riveting stronger than dome head?
Countersunk heads give a flush finish, but they also remove material around the hole and can be less forgiving in thin sheet. Dome or large flange heads are commonly used when strength and clamp feel matter more than flushness.
What’s the cleanest way to remove a rivet without enlarging the hole?
Center punch, drill just through the head, then push the body through. Going slow and staying centered matters more than using a bigger bit.
If you’re working on a project where rivets will see vibration, outdoor weather, or load you can’t easily estimate, it may be worth sharing your material thickness and use case with a fastener supplier or a qualified technician so you choose the rivet type and grip range with less guesswork.