
How to use an air blow gun for cleaning comes down to three things most people skip: using the right pressure, choosing a nozzle that matches the job, and controlling where the debris actually goes.
If you have ever blasted dust off a workbench only to watch it drift back onto your parts, your clothes, or into a machine, you already know why technique matters more than power.
This guide keeps it practical, what to set up, what to avoid, and a few small habits that make compressed air cleaning faster and noticeably safer.
What an air blow gun is (and what it is not)
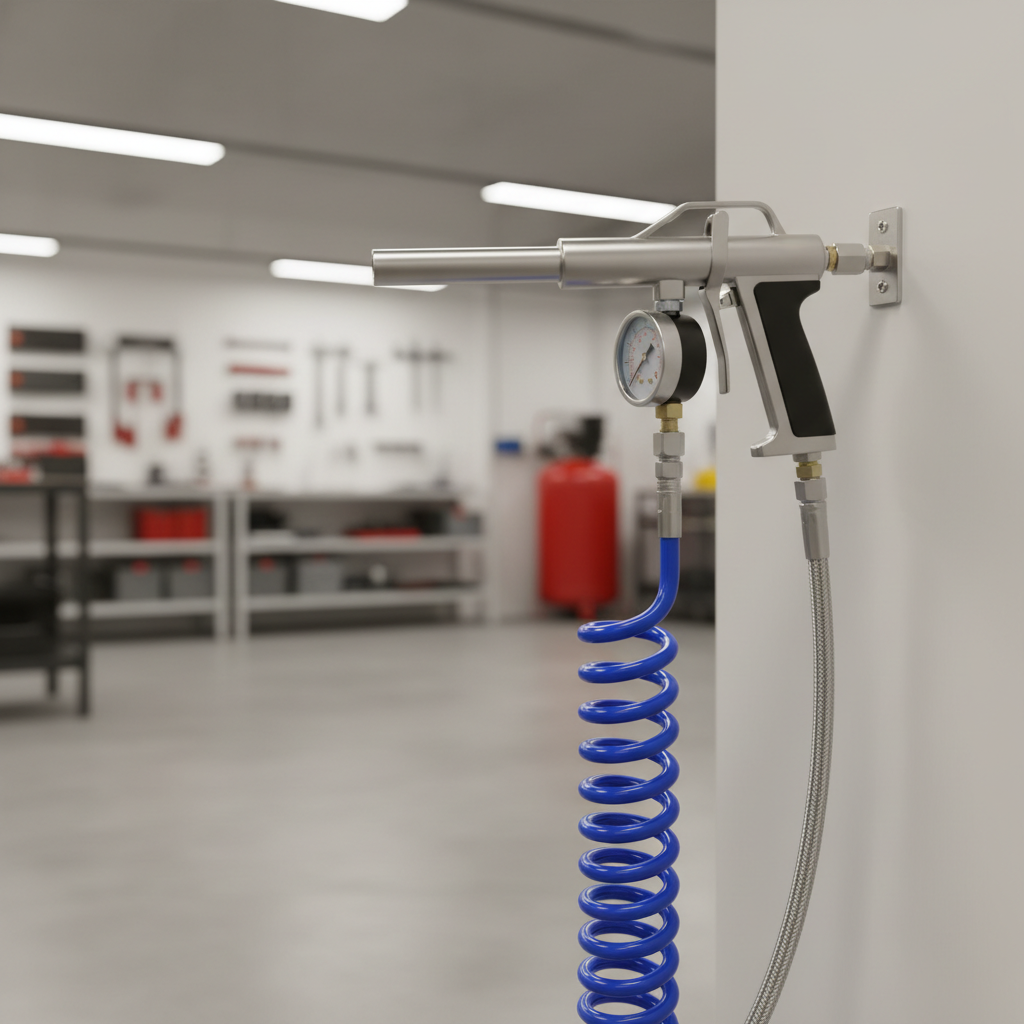
An air blow gun is a handheld tool that uses compressed air from a shop compressor to dislodge dust, chips, and moisture from surfaces and tight spaces. It is great for cleaning grooves, cooling fins, fixtures, and hard-to-reach pockets where a rag or brush struggles.
It is not a replacement for a vacuum when you need containment, and it is not a “sterilizing” tool. You are moving contamination, not deleting it, so your process should include where that contamination ends up.
Safety first: pressure, PPE, and airflow control
Compressed air is convenient, but it can also drive debris into skin, eyes, bearings, and electronics. It can also aerosolize fine dust, which is where many “quick cleanups” turn into a lingering haze.
According to OSHA (Occupational Safety and Health Administration), using compressed air for cleaning is generally restricted unless effective chip guarding and PPE are used, and pressure is controlled. Requirements can vary by workplace and application, so if you are cleaning in a jobsite or regulated facility, align with your EHS program.
Quick safety checklist before you pull the trigger
- Wear eye protection at minimum. Add a face shield when blowing chips or brittle debris.
- Control pressure at the regulator, not only at the trigger.
- Never aim at skin or use compressed air to “clean” clothing. That habit causes real injuries.
- Point away from yourself and others, and plan an exit path for dust and chips.
- Use hearing protection if the blow gun or compressor noise is high.
- If the dust might be hazardous (silica, lead paint, unknown powders), use a vacuum with proper filtration instead and consider professional guidance.
One more real-world note: the safest cleanup is often a combination, vacuum first to remove bulk dust, then short bursts of air for the stubborn corners.
Setup that makes cleaning easier (compressor, regulator, hose, filters)
If your air system spits water or oil mist, cleaning becomes “spraying grime.” Many users blame the blow gun when the real issue is upstream air quality.
Recommended setup basics
- Regulator at the point of use: keep it near the work area so you can fine-tune quickly.
- Moisture control: a water separator or filter helps reduce water spray, especially in humid garages.
- Hose management: kinks and quick-connect leaks create pressure drop and inconsistent blasts.
- Clean air for sensitive tasks: for electronics or painting areas, consider a finer coalescing filter. Many situations do not need it, but sensitive ones do.
Try this simple test: blow air onto a clean white paper towel from 6–10 inches away for a few seconds. If you see wet spotting or oily marks, fix air quality before you “clean” anything important.
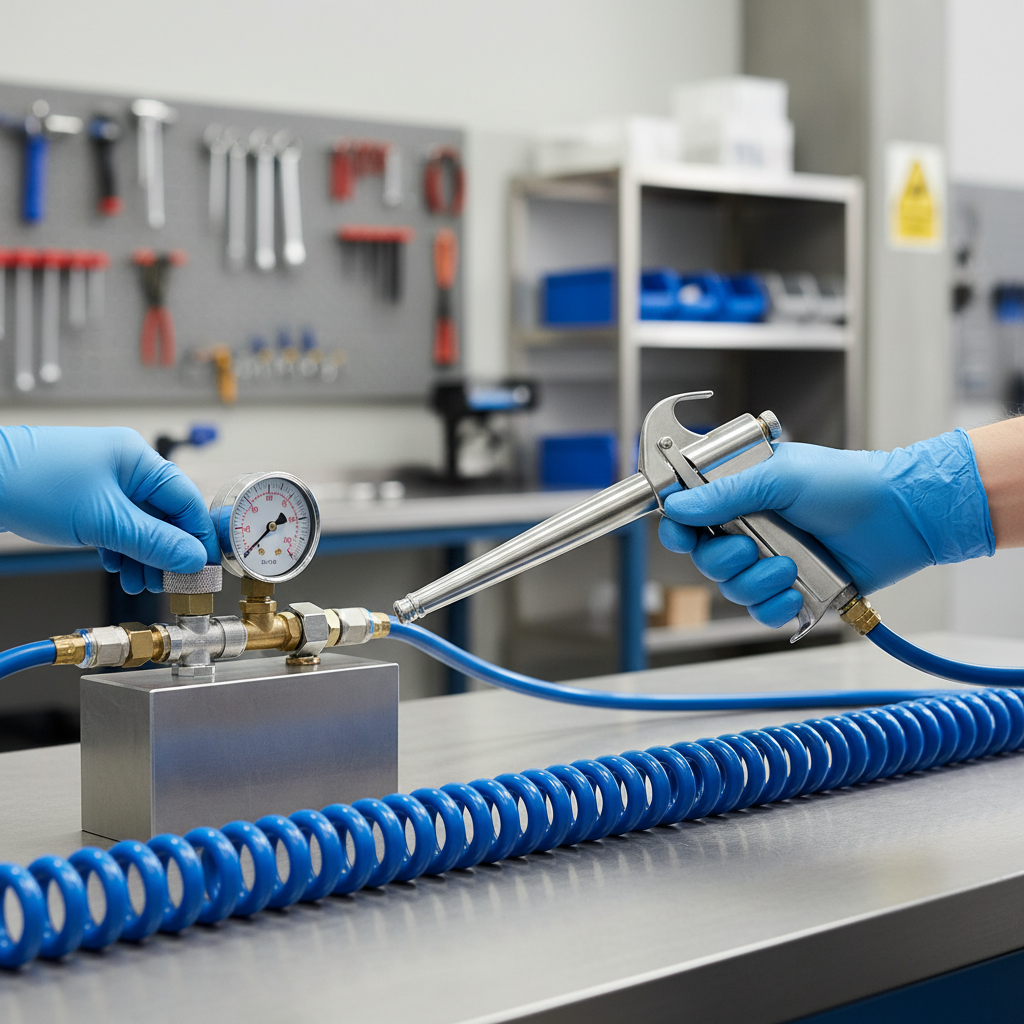
Choosing the right nozzle and accessories
Nozzles change how air behaves. A narrow tip concentrates force for crevices, while a safety nozzle can reduce dead-end pressure and noise. Picking the right one often matters more than adding PSI.
Common nozzle types and when they fit
- Standard tapered tip: general debris on benches, housings, fixtures.
- Long reach / extension: deep pockets, machine guards, radiator fins (use extra care not to bend fins).
- Wide fan tip: sweeping light dust off larger surfaces with less “sandblasting” effect.
- Rubber tip / soft blow tip: around delicate plastics, painted surfaces, and finished parts.
- Safety nozzle: designed to reduce dangerous dead-end pressure, often a good default for shared shops.
Accessories that quietly help a lot: a magnetic parts tray to keep fasteners from becoming projectiles, and a simple cardboard “backstop” to catch chips when you must blow off small parts.
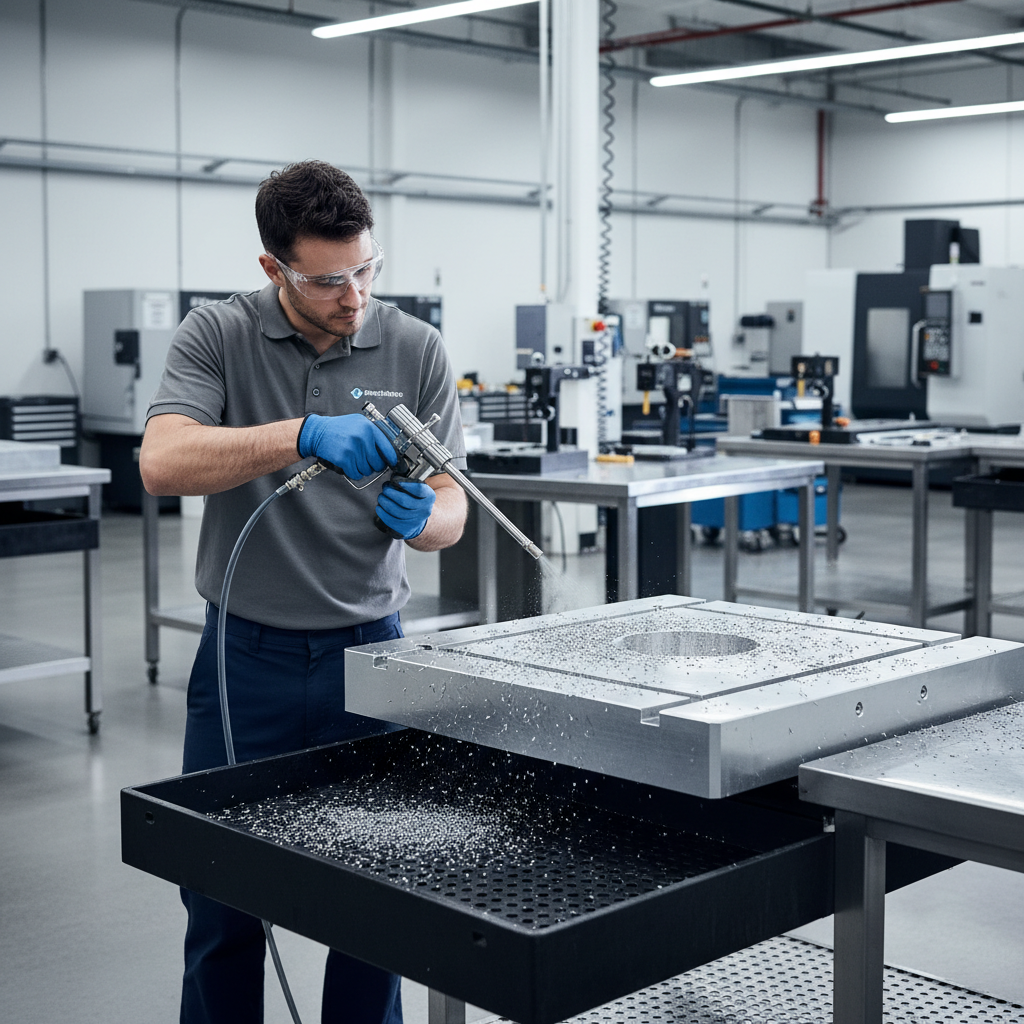
Step-by-step: how to use an air blow gun for cleaning (without spreading the mess)
How to use an air blow gun for cleaning effectively usually means working in a controlled pattern, in short bursts, and from the least risky angle. Long continuous blasts tend to scatter debris farther and kick up more fine dust.
1) Prepare the area
- Remove loose items you do not want to chase, washers, labels, tiny screws.
- Set a debris capture plan: a trash can, a dustpan, a vacuum hose nearby, or a backstop.
- If indoors, consider opening a door or improving ventilation, fine dust lingers.
2) Set pressure for the job
There is no universal PSI because materials and debris vary, but in many general shop cleanups, starting lower and stepping up is smarter than starting high. If you are cleaning electronics, bearings, seals, or painted surfaces, keep pressure modest and increase only when necessary.
- Start at a lower regulator setting, test on a corner or scrap.
- Increase only until debris moves reliably, then stop there.
- If you need “max pressure” to move dirt, that usually points to caked contamination, use a brush, solvent, or vacuum first.
3) Use angle and distance to stay in control
- Hold the nozzle at a shallow angle so debris skims away instead of bouncing straight back.
- Keep a reasonable distance. Closer is not always better, it can embed chips into softer surfaces.
- Use short pulses rather than a continuous blast, especially around wiring and connectors.
4) Work top-to-bottom, clean-to-dirty
This sounds fussy, but it saves time. Blow from higher surfaces down toward your capture zone, and from cleaner areas toward dirtier ones, you avoid re-contaminating what you just finished.
5) Finish with a “verification pass”
- Wipe critical sealing surfaces with a clean lint-free cloth.
- For precision parts, consider a final vacuum pass to remove what air loosened.
- Listen and feel: rattling chips in a housing or grit under a cover means you should re-open and remove mechanically.
Best practices by scenario (shop, car, electronics, HVAC)
The technique shifts based on what you are cleaning and what “clean” means in that context.
Workbenches, fixtures, and general shop cleanup
- Use a fan tip or standard tip, blow toward a dustpan or shop vacuum intake.
- Keep chips away from vises, slides, and tool holders, grit loves grease.
- Do not blow directly into motors or open bearings, vacuum those areas instead.
Automotive (interior cracks, engine bay, radiators)
- Interior crevices: short bursts, low pressure, pair with vacuum so debris does not redeposit.
- Engine bay: avoid directing air into sensors, connectors, or intake openings.
- Radiator and condenser fins: use a wider, gentler flow to reduce fin damage, a fin comb may be safer for bent areas.
Electronics and keyboards
Blowing dust off electronics can be fine, but static, moisture, and overspinning fans are common issues. Many people do this casually, then wonder why a fan starts whining later.
- Keep pressure low and distance longer than you think you need.
- Hold fans in place so they do not overspin.
- If you see oily mist from your air line, stop and fix filtration, do not “power through.”
HVAC vents and filters
- Air blowing can dislodge dust, but it often redistributes it into the room.
- Use a vacuum with a brush attachment for registers when possible, then air only for stubborn corners.
- If you suspect mold, water damage, or unknown contaminants, consider consulting an HVAC professional.
Common mistakes that cause damage (or just waste time)
- Cranking pressure to “get it done”: increases rebound, dust clouds, and surface damage risk.
- Blowing into tight bearings or seals: can push contamination deeper or displace lubrication.
- Cleaning without containment: you may finish the part, but the room stays dirty.
- Ignoring water in the line: moisture turns dust into grime, then you need solvents later.
- Using air to clean clothing: unsafe, and many workplaces prohibit it for good reason.
If your cleanup keeps “coming back,” the fix is often boring: reduce pressure, add filtration, change nozzle, and pair the blow gun with a vacuum.
Quick reference table: nozzle, pressure approach, and use cases
Use this as a starting point, then adjust based on material, debris type, and your shop’s safety rules.
| Task | Nozzle choice | Pressure approach | Best companion tool |
|---|---|---|---|
| Bench dust and light debris | Fan or standard tip | Start low, increase only as needed | Dustpan or shop vacuum |
| Metal chips in crevices | Long reach / extension | Moderate, short pulses | Backstop + magnet tray |
| Electronics / PC cleaning | Soft tip or safety nozzle | Low, keep distance | ESD-safe vacuum (if available) |
| Automotive interior cracks | Standard or soft tip | Low to moderate | Vacuum with crevice tool |
| Radiator/condenser fins | Fan tip | Low, wide flow | Fin comb (for bent fins) |
Key takeaways (so you remember this tomorrow)
- Lower pressure + better nozzle usually beats “more PSI.”
- Plan where debris goes, or you will clean the same dust twice.
- Short bursts, shallow angles, and top-to-bottom patterns keep results consistent.
- If contamination could be hazardous, choose containment methods and consider professional advice.
Conclusion: make compressed air cleaning predictable
How to use an air blow gun for cleaning is less about blasting and more about control, pressure at the regulator, a nozzle that matches the surface, and a cleanup flow that moves debris toward capture instead of into the air.
If you want one action to take today, set your regulator lower than you normally do, add a backstop or vacuum intake, then test short pulses from a shallow angle. The job often finishes faster, and the shop stays cleaner after you walk away.
FAQ
- What PSI should I use with an air blow gun for cleaning?
It depends on the material and debris, but many tasks work well at lower settings than people expect. Start low, test, and increase only until debris moves reliably, your shop may also have safety limits you must follow. - Is it safe to blow dust off a computer with compressed air?
Often yes with care, but keep pressure low, keep distance, and prevent fans from overspinning. If your air line carries moisture or oil mist, avoid using it on electronics until filtration is addressed. - Why does my air blow gun spray water sometimes?
Moisture is common when the compressor tank is not drained regularly or when you lack a water separator. Improving filtration and draining the tank usually helps, persistent issues may need a dryer depending on climate and duty cycle. - Can I use an air blow gun to clean my clothes?
It is not recommended and may be prohibited in workplaces because compressed air can inject debris into skin or eyes. Use a vacuum, lint roller, or designated garment cleaning methods instead. - What is a safety nozzle and do I need one?
A safety nozzle is designed to reduce dead-end pressure and often lowers risk during cleaning. Many shops standardize on them for general use, especially where multiple users share tools. - Air blow gun vs shop vac: which is better for cleanup?
A vacuum wins when you need containment and indoor air quality, while compressed air shines for tight gaps and dislodging stuck debris. In practice, pairing them gives the cleanest result.