
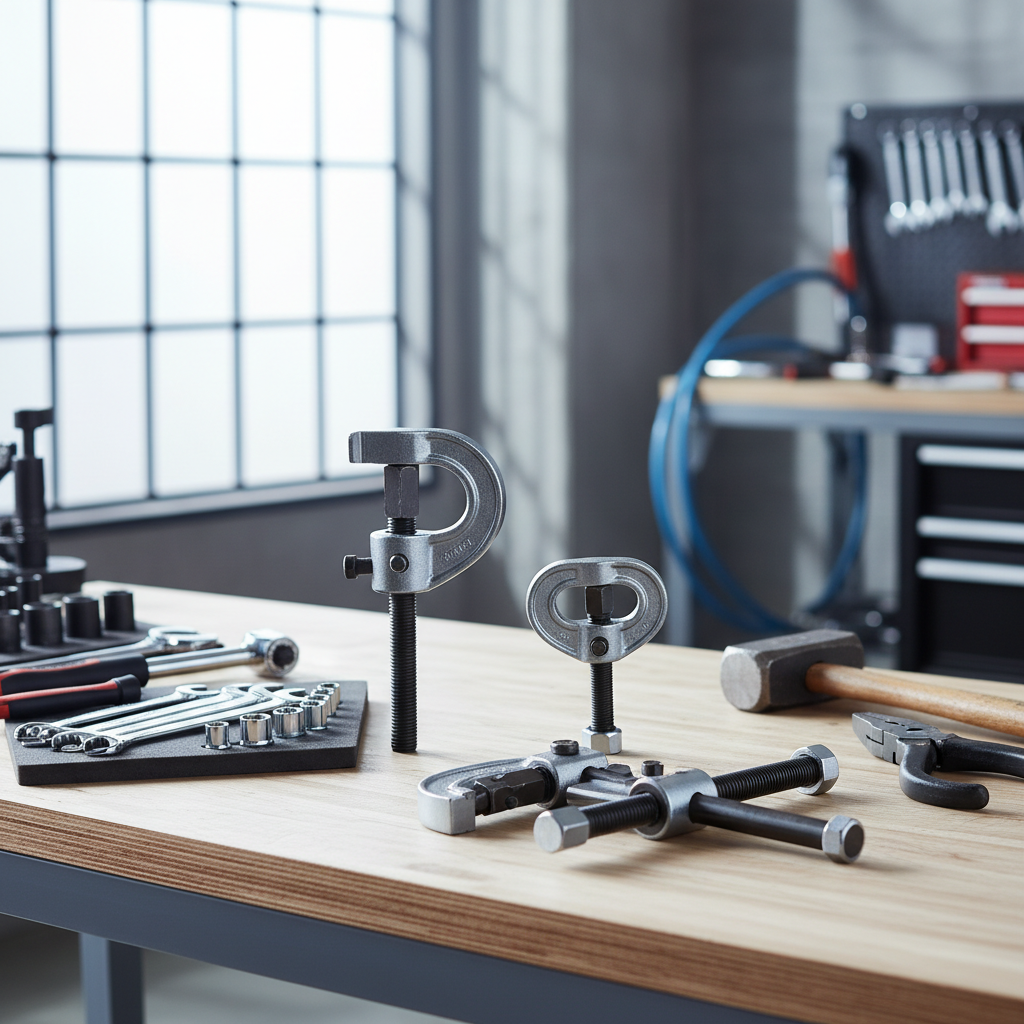
Gear puller 2 3 jaw adjustable tools are the go-to answer when a gear, pulley, or bearing refuses to budge and you still want to keep the shaft and housing in one piece.
If you’ve ever leaned on a pry bar, heard that ugly “ping,” and realized you’re one slip away from cracking a pulley or mushrooming the shaft end, you already know why a proper puller matters. The right puller turns a risky wrestling match into controlled force.
This guide breaks down when to use 2-jaw vs 3-jaw, what “adjustable” really means in practice, how to size one for your job, and the small setup details that separate a clean pull from a ruined part.
What “2 & 3 jaw adjustable” really means
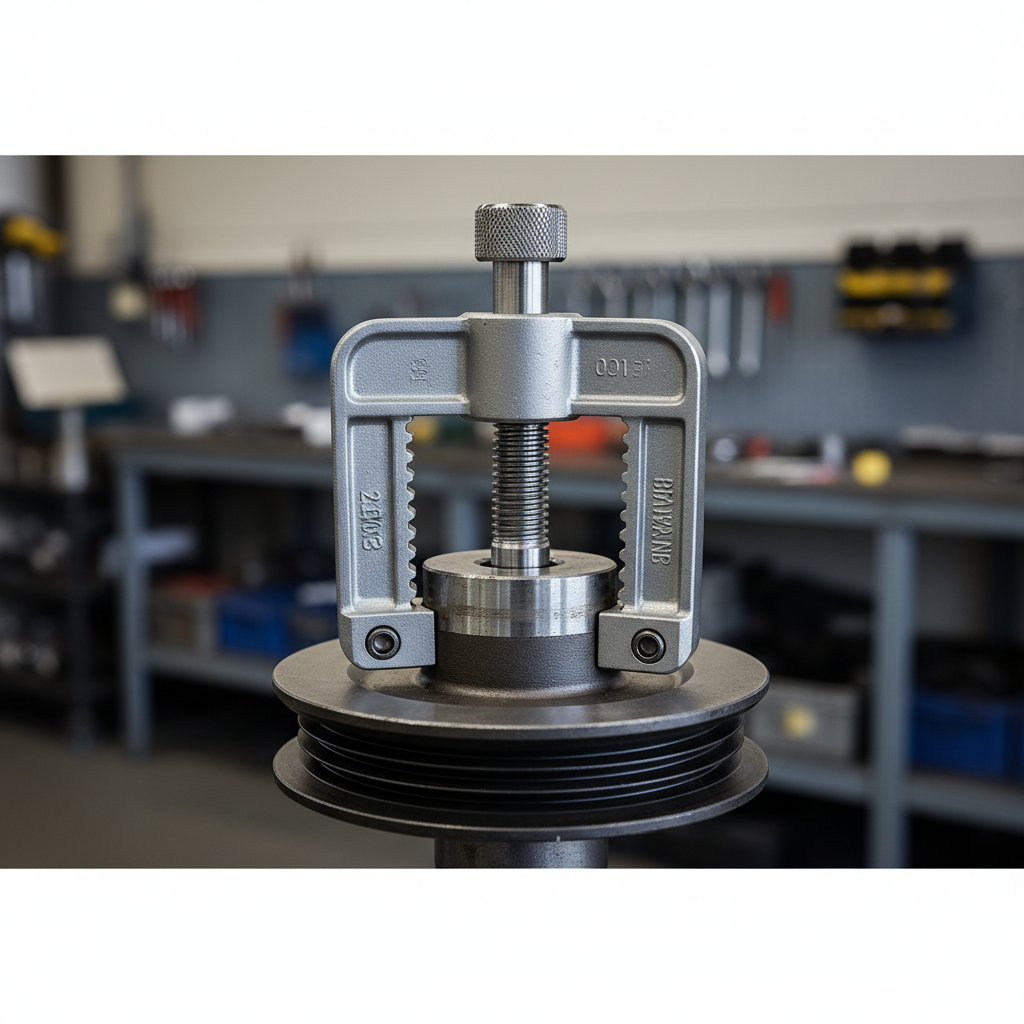
A puller’s job is simple: apply straight, even pressure to pull a press-fit part off a shaft. The “2 & 3 jaw adjustable” wording usually points to either a convertible puller (switches between two and three jaws) or a set that includes both configurations.
2-jaw vs 3-jaw in plain terms
- 3-jaw puller: Self-centers more easily and spreads load more evenly, which often reduces the chance of cocking the part sideways.
- 2-jaw puller: Fits where access is tight or one side is blocked, and can grab irregular shapes that a 3-jaw can’t.
“Adjustable” generally means the jaws slide along a crossbar or arms so you can match different diameters, and many models let you reverse the jaws for inside pulling (pulling from behind a lip) versus outside pulling (grabbing the outside edge).
Why parts get stuck (and why brute force backfires)
Most stuck components aren’t “glued” on, they’re stuck because of fit and time. Press fits, corrosion, heat cycles, and tiny burrs on the shaft all add up.
- Press/interference fit: The part was installed with force, so removal also needs controlled force.
- Rust and fretting: Micro-movement can create oxidation that behaves like abrasive paste.
- Heat cycling: Repeated expansion and contraction can tighten the relationship between hub and shaft.
- Previous damage: A nicked shaft or mushroomed end makes removal harder and more destructive.
When people pry, hammer, or wedge, the force usually isn’t centered. That’s how you crack cast pulleys, bend thin gear faces, or ruin bearings you meant to reuse.
Quick self-check: do you need a 2-jaw, 3-jaw, or a different tool?
Before you buy (or before you start cranking), take 30 seconds to sort your scenario. This saves a lot of stripped threads and busted knuckles.
- You have clear access all around the part: A 3-jaw puller is usually the calmest option.
- One side is blocked by a housing, bracket, or frame: 2-jaw often fits better.
- You can only pull from inside a lip or groove: You may need reversible jaws or a dedicated internal puller.
- The hub has no safe gripping surface: Consider a bearing separator/splitter behind the part, then pull from that.
- You’re pulling a harmonic balancer or specialized automotive part: A dedicated puller kit might be safer than a generic jaw puller.
If you’re unsure whether the part is threaded, pinned, or retained by a snap ring, stop and verify. Pulling against a hidden retainer can damage the shaft or the housing fast.
How to choose the right gear puller (size, reach, and capacity)
Shopping for a gear puller 2 3 jaw adjustable model is less about “how many jaws” and more about matching geometry and load. Here’s what tends to matter in the real world.
Key specs that affect whether it works
- Max spread (jaw capacity): Must fit around the outside diameter you need to grab.
- Reach: How deep the jaws can hook behind the part. Shallow reach is a common reason pullers slip.
- Center screw travel: Determines how far you can pull before resetting.
- Rated capacity: Not always listed clearly, but stronger frames and thicker crossbars usually handle tougher jobs.
- Tip style on forcing screw: A pointed tip can wander; a flatter or interchangeable tip tends to stay centered better.
Comparison table: what to look for
| Feature | Why it matters | What to pick in many cases |
|---|---|---|
| 2-jaw configuration | Fits tight access, can grab odd shapes | Choose if you expect obstructions or offset clearances |
| 3-jaw configuration | More even load, easier centering | Choose for general work where you can access all sides |
| Reversible jaws | Enables inside vs outside pulling | Worth it if you do varied jobs, not just pulleys |
| Longer reach arms | Prevents slipping, grabs behind thicker hubs | Go longer if you work on bearings/gears with deep hubs |
| Stronger yoke/crossbar | Reduces flex, keeps pull straight | Heavier-duty frame for seized parts or larger diameters |
How to use a 2/3 jaw adjustable puller without damaging parts
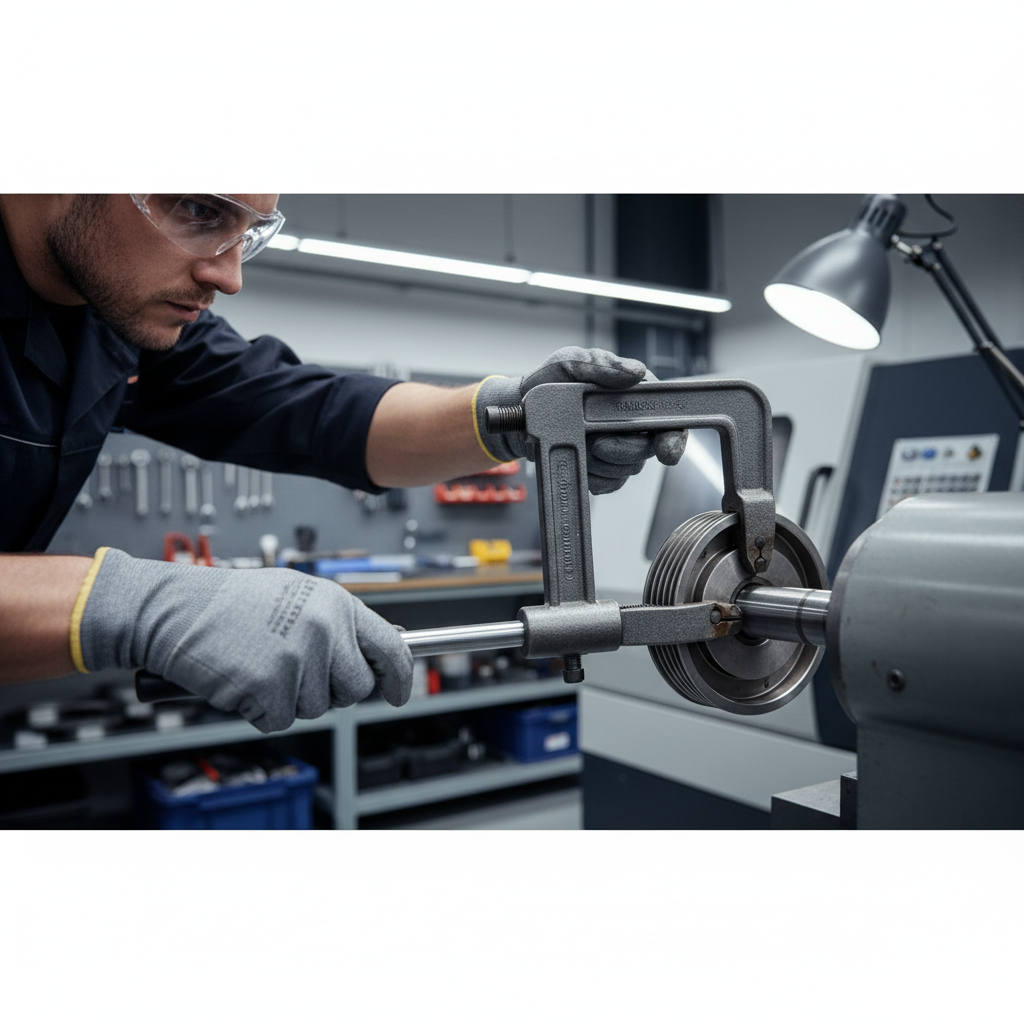
A clean pull is mostly setup. The crank part is the easy part. According to OSHA, injuries are often linked to tool misuse and flying objects, so eye protection and stable positioning are not “extra,” they’re baseline.
Step-by-step setup (works for most pulls)
- Inspect first: Look for snap rings, set screws, keys, tapered fits, or retaining plates. Remove them before applying force.
- Soak and wait: Penetrating oil can help on rusty interfaces, but it needs time. Wiping and reapplying beats dumping more product.
- Seat the jaws: Hook behind the hub, not thin gear teeth. If you can’t grab the hub, switch tools (separator/splitter).
- Center the forcing screw: If the shaft end is soft, use a small protective pad or the correct tip so you don’t mushroom it.
- Keep it square: Sight from two angles. If it’s pulling crooked, back off and reset before it binds.
- Apply force gradually: Smooth turns beat sudden torque. If it feels like it’s “loading” without moving, reassess.
Key point: If the puller starts walking off the hub, don’t “power through.” That’s when jaws slip and parts chip.
Practical troubleshooting: when it won’t move
Sometimes the puller is “right,” and the part still refuses. At that point, you’re choosing between smarter force and smarter methods.
- Jaws keep slipping: You likely lack reach, you’re grabbing a tapered surface, or the hub edge is too rounded. A bearing separator behind the part often fixes this.
- Pull feels springy: The frame may be flexing. Consider a heavier puller, shorter extension, or a different style (hydraulic puller).
- Screw binds hard: Clean and lubricate the forcing screw threads. Dirty threads can “fake” high resistance.
- Part starts to cock sideways: Reset and ensure even jaw placement. For 2-jaw pulls, uneven bite is common.
- No movement after serious load: Light heat on the hub (not the shaft) can help in many cases, but avoid overheating seals, bearings, and flammables nearby.
If you use heat, do it cautiously and consider manufacturer guidance for the component. When in doubt, a local machine shop can often remove stubborn parts without collateral damage.
Common mistakes (the stuff that ruins shafts)
- Pulling on gear teeth: Teeth chip easily, and you can create stress cracks you won’t notice until failure later.
- Ignoring retainers: Snap rings and hidden set screws are classic “why won’t it move?” traps.
- Over-tightening in one go: Big torque spikes make the puller jump, then you’re chasing alignment.
- Using the wrong jaw orientation: Reversible jaws flipped the wrong way reduce contact area and invite slipping.
- No protection on shaft end: A mushroomed shaft can turn a simple reassembly into grinding, filing, or replacement.
One more thing people forget: after removal, clean the shaft and bore, check for burrs, and verify keyways. Reinstalling onto a damaged surface often creates the “stuck forever” problem for the next person.
When to step up to a pro tool or professional help
A gear puller 2 3 jaw adjustable setup covers a lot, but not everything. If you see any of the signs below, it may be time to change the plan instead of cranking harder.
- Large diameter, high-interference parts: Hydraulic pullers or press work may be safer.
- Expensive housings or thin cast components: One slip can cost far more than the right tool.
- Unknown assembly history: If you suspect adhesives, peening, or non-standard retention, a tech may spot it quickly.
- Safety concerns: If the puller is heavily loaded and feels unstable, back off and rethink the setup.
According to NIOSH, controlling hazards and using appropriate tools reduces injury risk. If you’re working in a shop setting, following your facility safety procedures and tool limits is the safe call.
Conclusion: picking the puller that saves parts (and time)
A good adjustable puller earns its keep when you match it to access and load, set the jaws on a solid bite point, and keep the force centered. For most general removal jobs with decent access, the 3-jaw mode feels more forgiving, and 2-jaw becomes the practical choice when real machines block your perfect setup.
If you want one next step, measure the diameter you need to grab and the reach you need behind the hub, then pick a puller that comfortably exceeds both. That small buffer is usually what keeps you from slipping, redoing, and damaging parts.
FAQ
What is a gear puller 2 3 jaw adjustable tool used for?
It’s used to remove press-fit parts like gears, pulleys, bearings, and sprockets from a shaft by applying controlled, centered pulling force. The 2- and 3-jaw options help fit different access situations.
Is a 3-jaw puller always better than a 2-jaw puller?
Not always. 3-jaw often centers more easily, but 2-jaw can be the only workable option when a housing blocks one side or when the part shape prevents a three-point grip.
How do I know what size adjustable puller to buy?
Measure the outside diameter you need to hook and the depth you need to reach behind the part. Then choose a puller with more spread and reach than your measurements, since real parts rarely give perfect gripping edges.
Can I use a jaw puller to remove a bearing by grabbing the outer race?
In many cases, grabbing the outer race risks damaging the bearing, especially if you plan to reuse it. A bearing separator behind the inner race (or the correct bearing puller) is usually safer for bearing-specific work.
Why does my puller keep slipping off the pulley?
Usually it’s jaw placement, insufficient reach, or grabbing a rounded/tapered edge. Reposition to grab behind a solid hub lip, or switch to a separator/splitter if there’s no reliable edge.
Is it okay to hit the puller screw with an impact wrench?
It can be risky. Sudden torque can shock-load the tool, strip threads, or cause the jaws to jump. If you use power tools at all, keep torque low and stop often to check alignment.
Should I use heat when a gear won’t come off?
Heat can help by expanding the hub, but it also can damage seals, change material properties, or create fire risk around oils. If you’re not confident, it’s reasonable to consult a professional or use a press/hydraulic method.
If you’re trying to standardize your toolbox for mixed jobs, choosing a well-built adjustable puller that converts between 2- and 3-jaw setups can be a practical “one kit, many pulls” approach, especially when you pair it with a bearing separator for the cases jaw pullers don’t handle cleanly.